You have no idea what it took me to make these macrame keychains.
I’m not telling you that making them is difficult. I’m not saying that the materials are hard to find.
They are crazy easy to make and you can get everything you need delivered right to your door from Amazon.
You can make these adorable Macrame Keychains yourself in less than 30 minutes once you’ve got the knots down pat. And you’ll have those down pat in no time.
So What is My Problem?
The problem for me with these keychains is that they are the first project I’m sharing on Craft and Confidence and that scares me into a frozen puddle.
Here’s a bit more on that image of me as a frozen puddle.
At first I was anxious about starting this new project where I talk about making crafts and how I feel that can help you build confidence in other areas of your life.
That was me as a liquid puddle. Anxious, but excited because I’d gotten amazing feedback on this idea and on this post about How to Build Confidence from my mentor whose advice I trust implicitly.
So, normal type of anxious in this phase.
Then I started to get cold. A shiver rang through me when I thought about making the craft, making videos of it, taking pictures, writing tutorials and generally starting from scratch with this whole thing.
And that’s when I start to freeze.
I think about how badly I want it to work right. And how it scares me to tears every time I think about the possibility of it failing.
How am I going to help anyone with confidence when I’m scared? I can’t do anything in this state.
I’m using the image of a frozen puddle because I am frozen. Unable to take action. So scared I can’t move myself to just try and get started.
So instead of making the video and taking the pictures and writing the tutorial, I’m starting with just these words. Because they are less scary for me.
And because the point of this is more than just “How to Make a Macrame Keychain in 30 Minutes or Less”.
The point of this is that I believe that in learning new things like how to make a macrame keychain in 30 minutes or less, I think that you are also learning that you are capable of doing other things you didn’t think you could do.
And for me, that is the definition of what is confidence.
If you’re just here for the Macrame Tutorial, go on ahead and get started on it. Whether you read my thoughts on confidence doesn’t really matter, you’re going to build confidence just by the making of the keychains either way.
But I’d love it if you started here and read about why I’m doing this thing. Why I’ve created this strange marriage of Craft and Confidence.
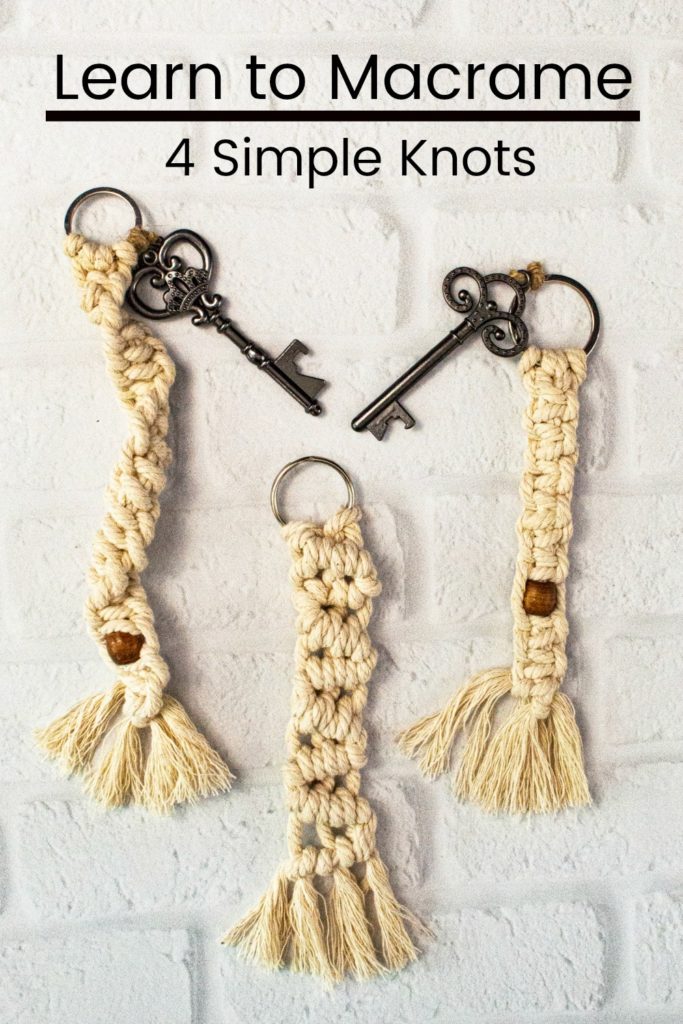
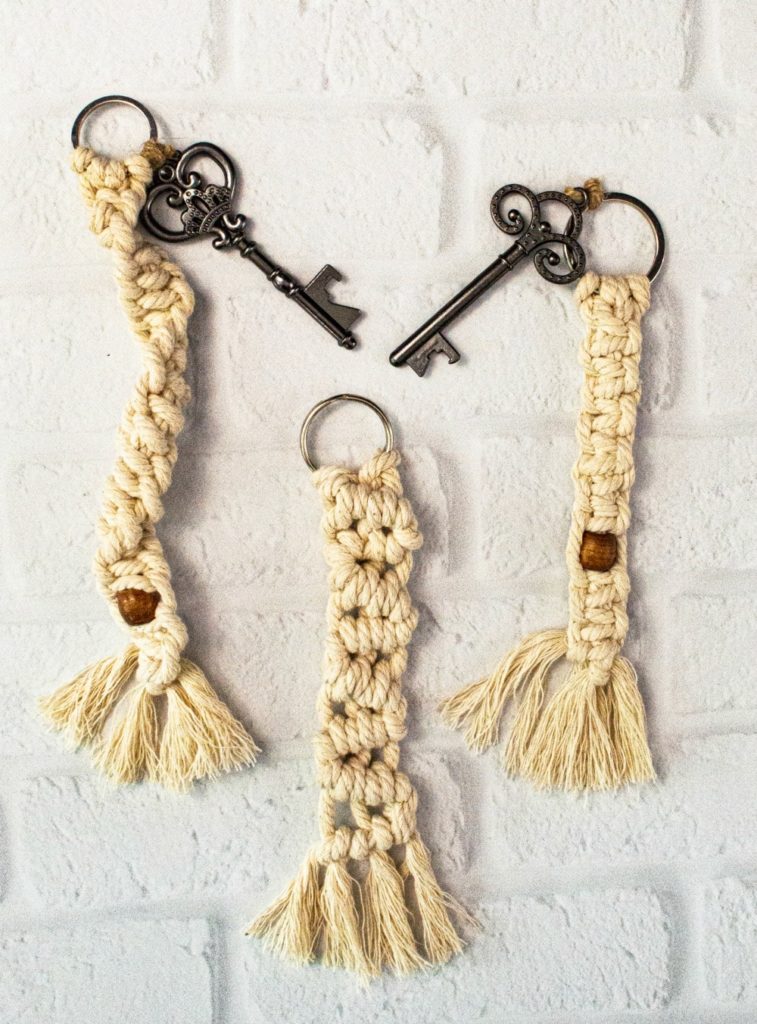
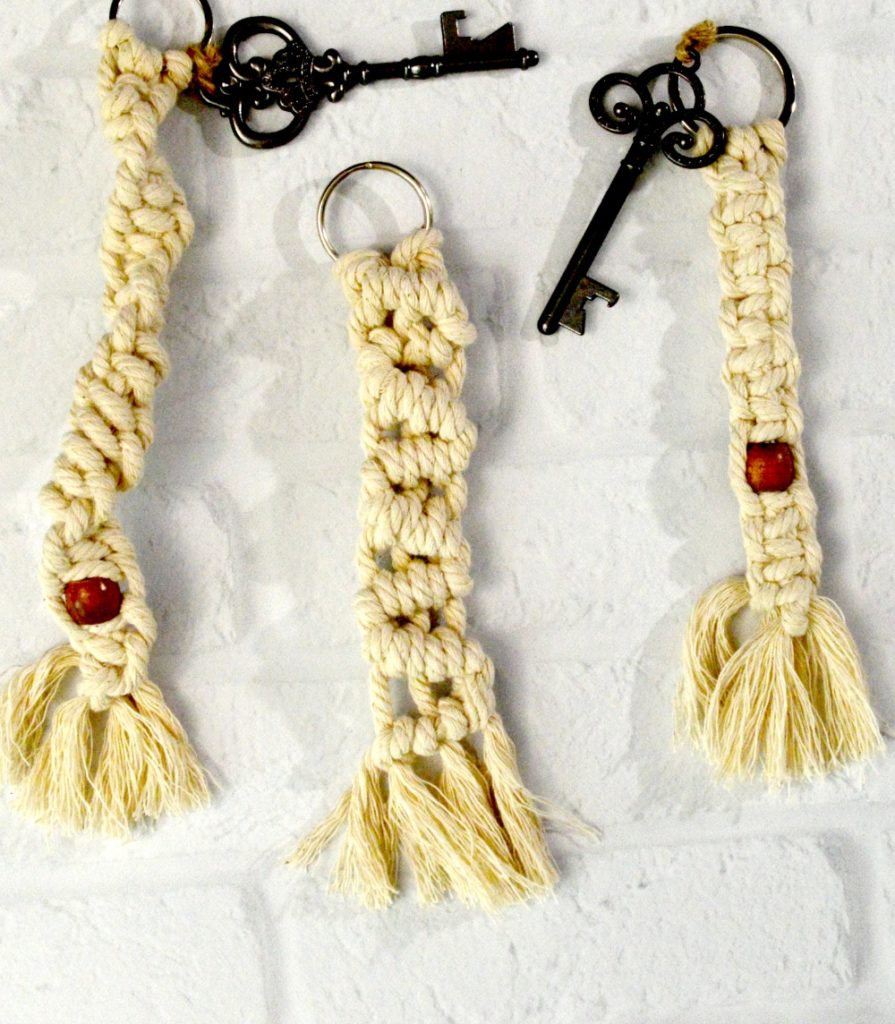
Macrame Keychain Tutorials
My goal with these keychains is to teach the simplest of the Macrame knots which you can then apply to bigger projects.
So, this is like a Macrame appetizer platter, if you will.
Macrame Three Ways.
Materials for Macrame Keychains
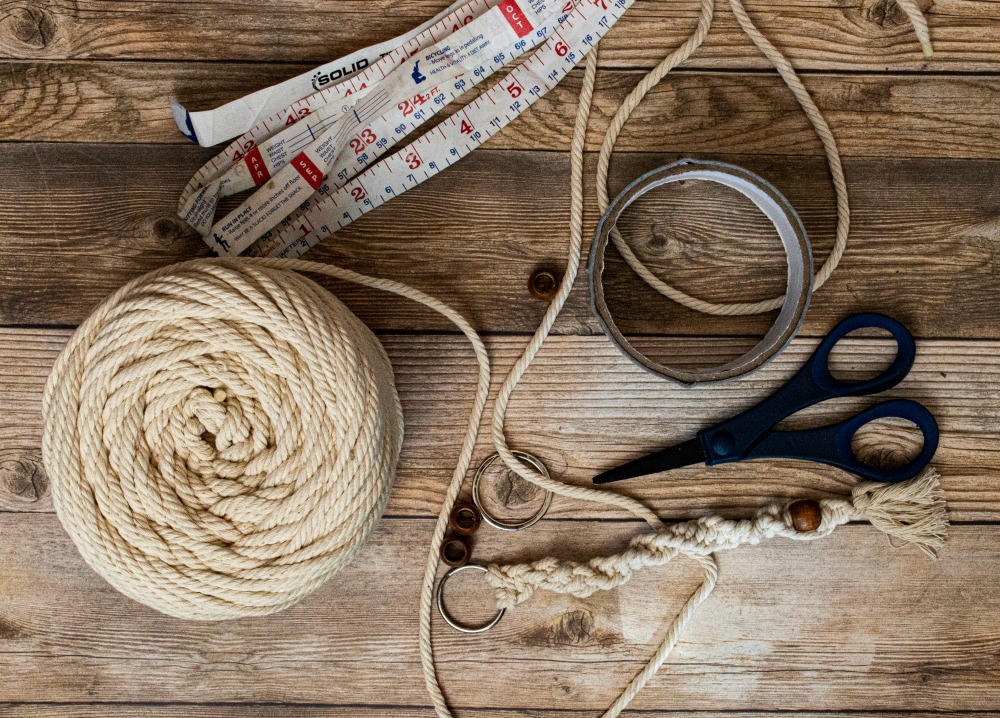
Macrame Cord
Keychain Holder thingie (I used the one I already had my car keys on)
Scissors
Tape measure or ruler
Some Wooden Beads
Duct Tape
A comb (optional) (and the old school kind they used to give you on class picture day is perfect)
Instructions
We’re going to learn the square knot on this one. The square knot you’ll end up using a lot if you continue on this macrame journey, but do not worry. It’s super simple.
Step 1
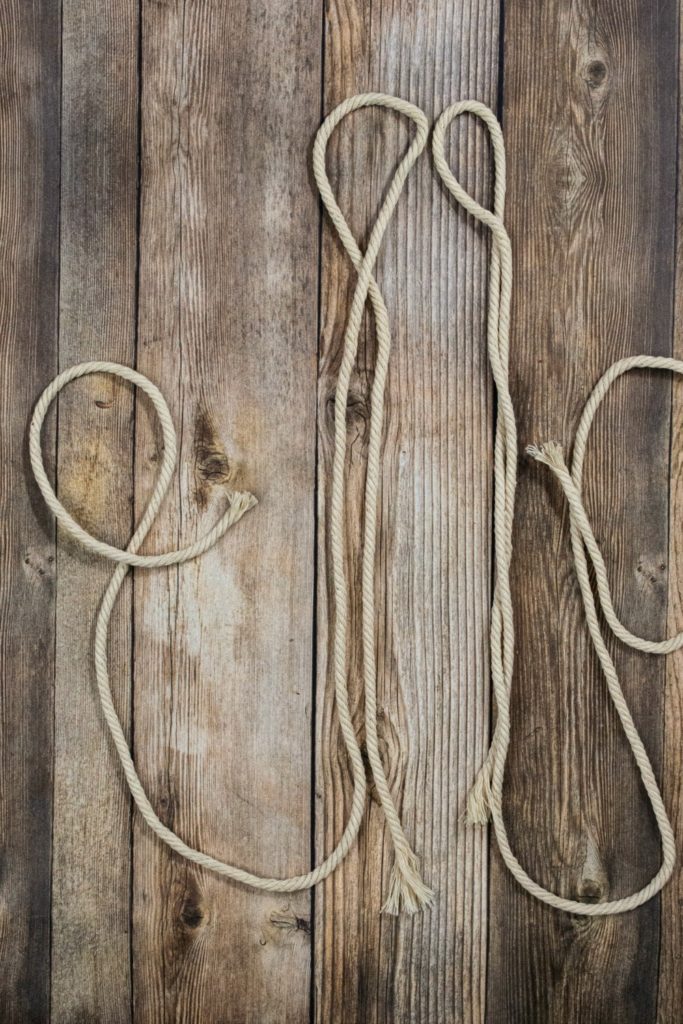
Cut two 50 inch pieces of Macrame Cord. I do this by measuring 10 inches of cord and then measuring the rest against that 4 more times til I have 50 inches. It doesn’t have to be scientifically perfect 50 inches, ok?
Here’s what that looks like:
Step 2
Most of the time when you macrame, you are going to fold your cords in half. We are not doing that this time. We are folding one side over so that the short side is about 1/3 the size of the long size.
I’m terrible at explaining anything math related, so just look at the picture, it will make FAR more sense, I promise.
Here’s what that looks like:
Step 3
Attach the cords to your keychain. You will do this with a Lark’s Head Knot.
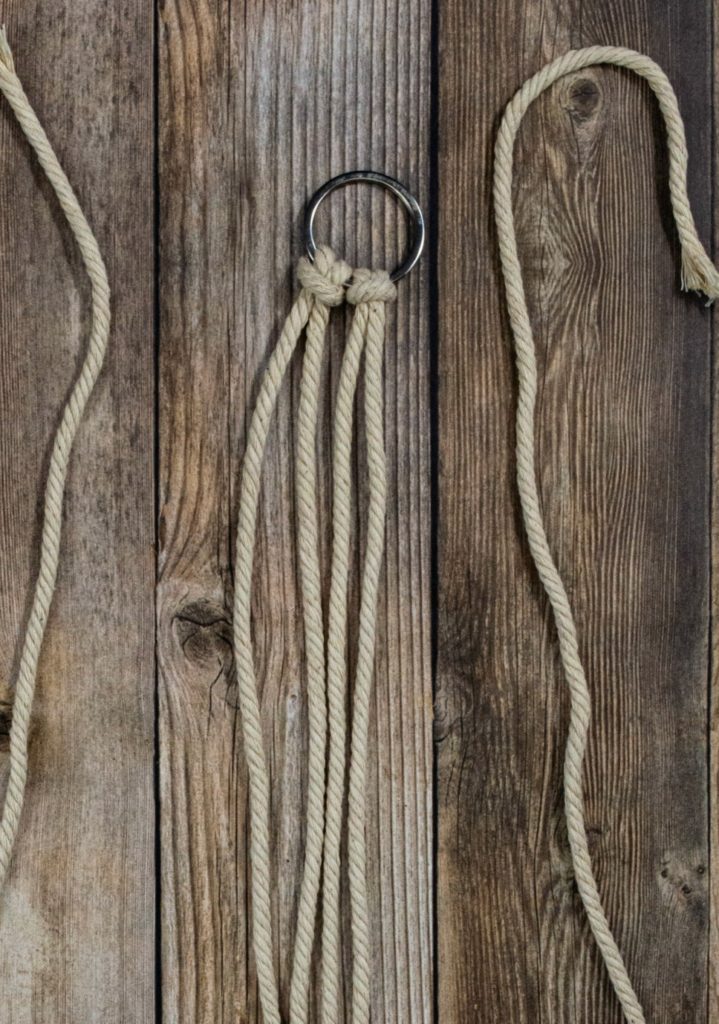
I do not know why it is called that. If that is what a Lark’s Head looks like, then that is a bird I have not seen in the wild ever before. It is a very easy knot to make though.
You are going to grab the folded end of your cord, lay it over the bottom of your keychain, making sure that the short ends are in the middle and then pull the rest of the cord through the loop as you’ll see below in this video.
You’ve just made your first Macrame knot! Now repeat that step with the other piece of cord.
Use a piece of duct tape to secure your keychain to your work surface.
Step 4
We’re going to make this keychain out of Square Knots. I’m going to warn you, there might be a few moments where you want to strangle me until you feel comfortable with this knot.
DO NOT GIVE UP
This isn’t hard, it only feels hard because you don’t know how yet.
You now have 4 pieces of string in front of you, two long strings on the outside and two short ones in the middle, all attached to your key chain holder which you have taped to your work surface with some duct tape.
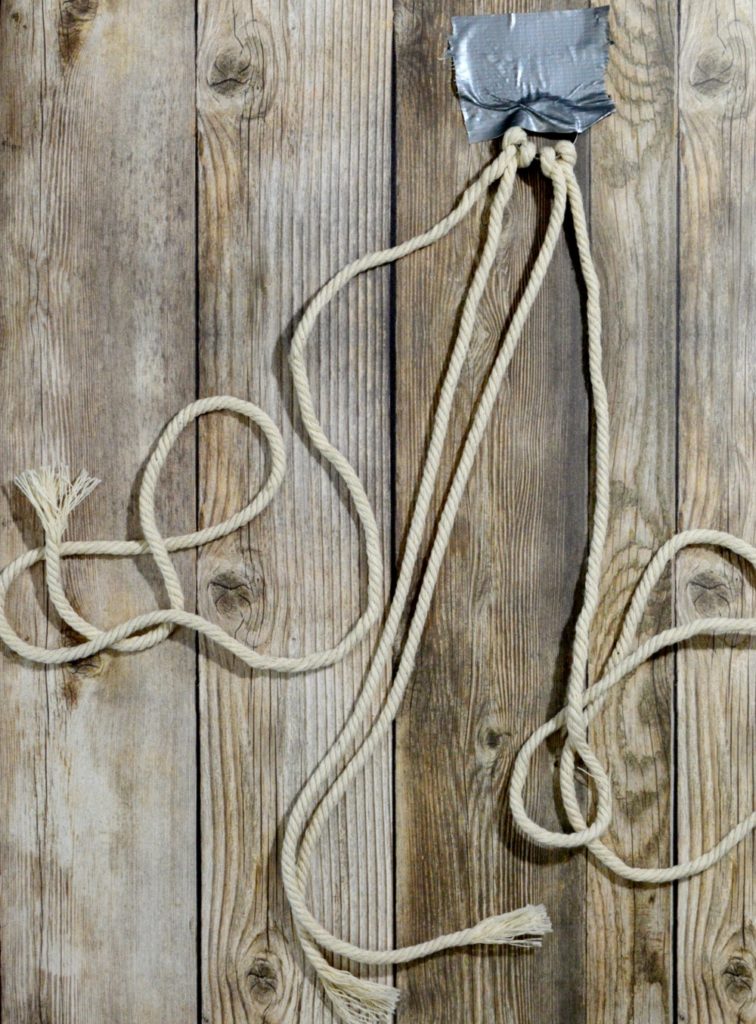
You’re going to start on the right.
Cross the far right cord over the two middle cords. It will look like a four.
Take the far left cord and lay it over the cord you just made the four with.
Take the far left cord and pull it underneath the two middle cords and THROUGH the opening of the four.
Tie the knot by pulling upwards on the two outside cords. You will need to pull the two middle cords downward as you go so that they don’t bunch up.
Repeat the same process but this time starting with the left hand side.
I know reading that sounds ridiculous which is exactly why I made a video as much as I didn’t want to make a video.
Step 5
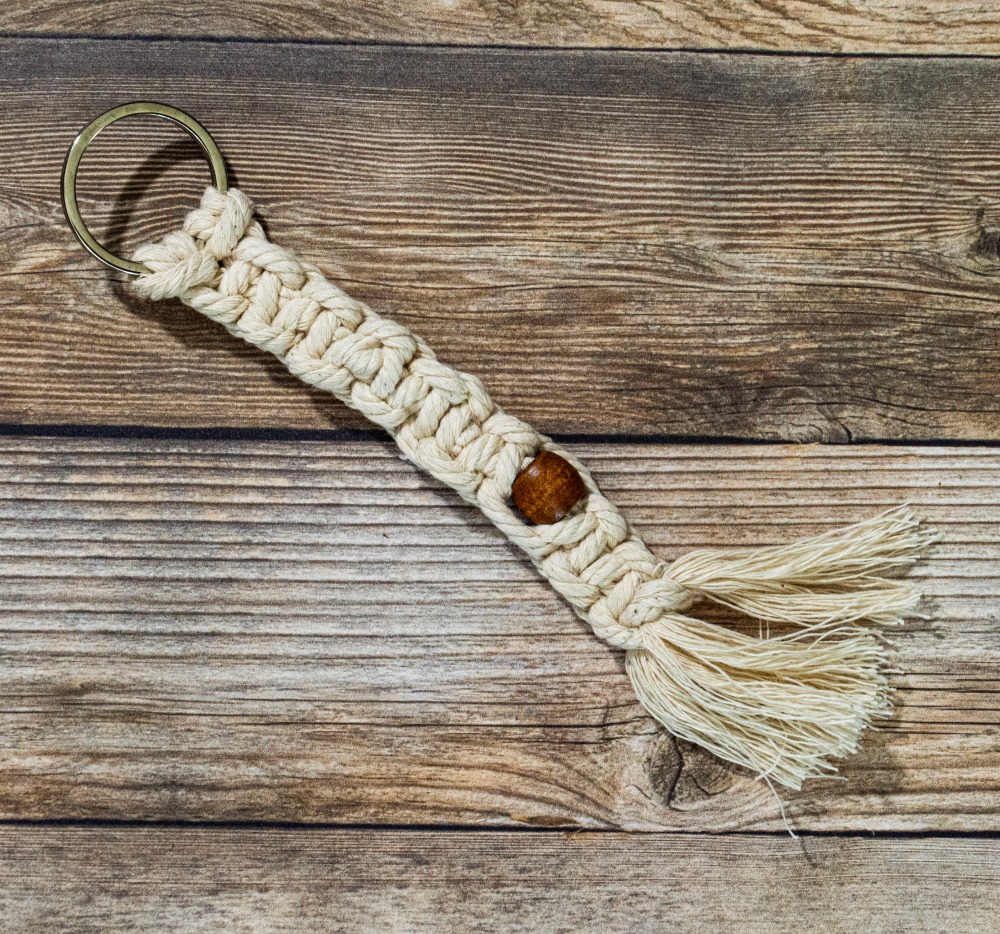
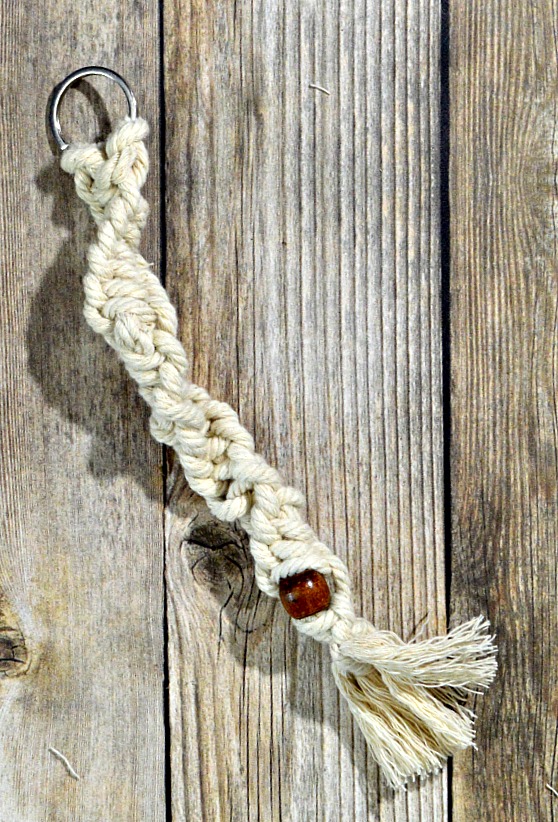
Keep going with the Square knots til the keychain is about half way as long as you want it to be. Or longer.
Basically when you are at a place on your keychain where you think you might like to add a wooden bead, stop and take your wooden bead and feed it onto the two middle strings.
Then continue with your square knots.
Step 6
When you have your keychain at the desired length, you can tie off the bottom with a good old regular knot.
If you like the frayed edges look, you can achieve this by combing through the macrame cord with a small comb.
Half Square Knot Macrame Keychain
This next one is sort of easier than the first one!
I say sort of because it gets it kind of fights you a little as you go, but don’t worry, you’re going to win this fight.
The Half Square Knot starts the same as the Square Knot.
Step 1
Start just as you did the Square Knot keychain. Cut off two pieces of 50 inch cord, fold each so that one side is about 1/3 the length of the other. Attach the two pieces to your key ring with a Lark’s Head Knot.
Step 2
This time, instead of alternating sides with the Square Knot, you are going to start on the same side every time.
So begin your square knot just as you did on the right side, but instead of switching over to the left, continue making knots with the right.
Soon you’ll see your keychain wants to start to twist.
This is what I meant when I said it wants to fight you little. You have to make sure you’re staying on the same side even as the cord is trying to twist and confuse you.
Ok, that makes it sound like a psychological battle between you and some cord. It’s not hard. It’s just some cord, after all.
Here’s the video so you see I won the battle without breaking a sweat.
Step 3
If you would like to add a wooden bead to this one, the process is still the same. Stop when you get to a place you would like the bead to be, string it up the middle two cords and then continue with your half square knots.
Step 4
Finish off your keychain just as we did previously with a couple of knots and, if you like, fray the ends with a comb.
Hitch Knot Macrame Keychain
This next one is a very simple knot. It’s one of those things that is so simple that it might make you think you’re doing it wrong.
I did this several times as I was trying to learn it. It’s called “overcomplicating” and I am occasionally a pro at it.
Just trust that this is indeed simple and follow along with me, ok?
Step 1
You are again going to cut off 2 pieces of 50 inch cord. This time however! You are going to fold in two equal halves, not 1/3 and 2/3’s as we have done previously. Two equal halves and then attach to your key ring with the Larks Head Knot.
Step 2
You have 4 pieces of cord in front of you, all equal lengths. Starting on either the far left or the far right, your choice, lay the first cord over the other three.
Take the second cord and loop it over the first cord, shimmy the little loop/knot you’ve just made snugly up the first cord and then repeat this process a second time with the same cord (the 2nd one).
Now do the same with the third cord and so on.
Don’t worry, here’s the video:
Step 3
You are going to repeat this process but this time starting from the other side.
Continue this process until you have a keychain length that you love.
Step 4
Finish off this keychain as we have the other. A couple of regular knots at the bottom and then fray the cord if you are into fraying.
Now You Can!
Hopefully by the time you are done here you’ve made a few Macrame keychains.
I know.
They are just keychains. Why do I feel like this is more important than it’s function of holding your keys for you?
For a few reasons. You didn’t know you could Macrame before you got here. You might have at some point in my tutorials thought things like,
Why am I bothering with this? I could have driven to the store and bought one by now!
or
I can’t figure this out. Her tutorial is awful. I quit.
But then you kept going because you wanted to make these. And you wanted to figure it out. So you fought through the frustration and you did it.
That’s a good feeling and it’s practice. It’s building you up a little for when you have to do something really hard.
It’s how you become resilient.
Also, the other reason is that you made something. You took that skein of cord and you tied it into a keychain. It didn’t exist before your hands formed it.
I think that’s special. I hope you do, too.